
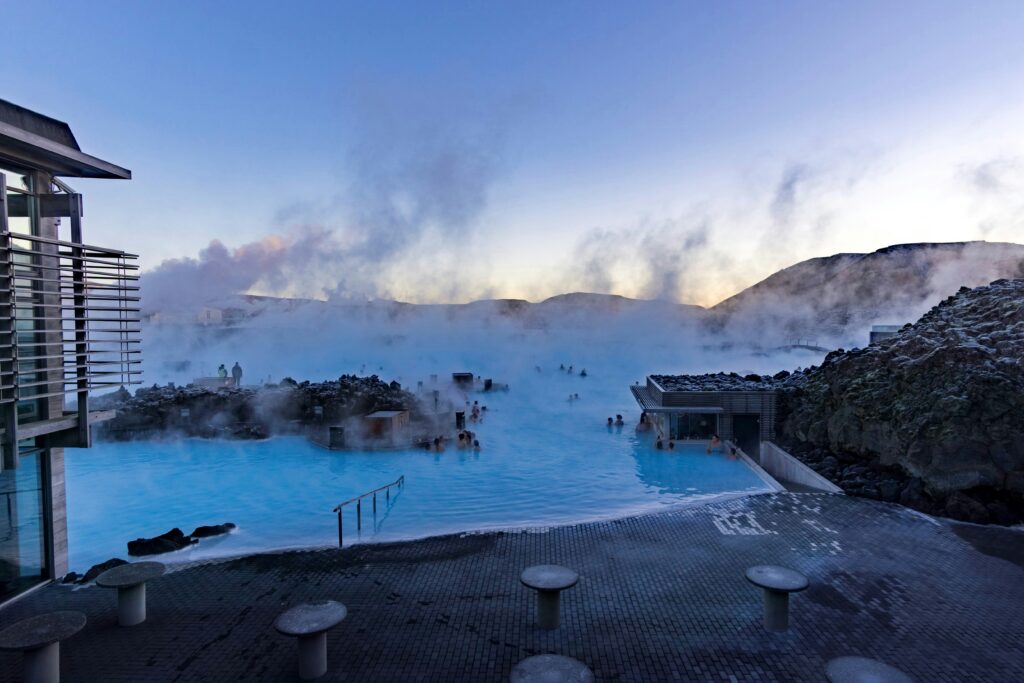
Introduction to Blue Lagoon
Ah, the Blue Lagoon in Iceland—it’s like stepping into a fantasy world where the sky kisses the earth, and the waters seem to glow. Known for its surreal blue waters and relaxing geothermal heat, this spa experience is bucket-list material. But hey, booking a landing pass might feel a bit overwhelming if it’s your first time. Don’t worry! I’ve got you covered with some top tips to make the process a breeze.
Understanding the Blue Lagoon Passes
First things first, let’s clarify what a landing pass is. Unlike your typical entry ticket, a landing pass gives you access to the Blue Lagoon’s facilities, including the geothermal baths, sauna, steam room, and more. You may also get a complimentary towel and a drink of your choice, making the experience even more enjoyable.
Types of Passes
The Blue Lagoon offers various passes to cater to different needs and preferences. Here’s a quick rundown:
- Standard Pass: This is your basic entry pass. Perfect if you want to enjoy the lagoon without additional frills.
- Comfort Pass: Includes a towel, a drink, and an upgraded shower experience. Great for those who appreciate a few extra perks.
- Premium Pass: With this pass, you get pretty much everything—robe rental, two drinks, and a reservation at the Lava Restaurant. Perfect for a special occasion or if you just want to treat yourself.
Tips for Booking Your Pass
Now that you know what kind of passes are available, let’s dive into how to book them without a hitch.
1. Book in Advance
This is a big one! The Blue Lagoon can get packed, especially during peak seasons like summer or when tourists flock during winter to see the Northern Lights. It’s wise to book your pass at least a few weeks in advance to secure your spot. Trust me; you don’t want to be that person left outside looking in!
2. Choose Off-Peak Times
If you can swing it, try going during off-peak hours. Midweek visits or early morning slots are less crowded, which means you can enjoy the tranquility of the lagoon. Plus, you might just get a few moments by yourself to soak in the experience without too many strangers around.
3. Use the Official Website
For the most reliable information and the best deals, always book directly through the official Blue Lagoon website. Other platforms might charge extra or have misleading information. Plus, booking directly often means you’ll get the latest updates on health guidelines, amenities, and special offers.
4. Consider Your Travel Dates
If your travel dates are flexible, plan around local holidays or events that might impact visitor numbers. For instance, if there’s a major festival in Reykjavik, hotel prices may soar, and chances are everyone is heading to the lagoon for relaxation afterward.
5. Account for Additional Costs
When budgeting, remember that while your landing pass covers the lagoon experience, extras like food, drinks, and spa treatments can add up. If you’re going for the Premium pass, the meals included are usually well worth it, but if you’re on a budget, consider dining outside the lagoon.
What to Bring
Ah, packing can be tricky. Here’s a quick checklist to make sure you’re fully prepared:
- Swimwear: This one’s obvious, right? But don’t forget to bring a spare set if you plan on exploring afterward!
- Flip-Flops: Your feet deserve the extra comfort, especially on cold tiles.
- Camera: The views are incredible, so you’ll want to snap a few pics. Just remember, no underwater phone shots unless it’s a waterproof case!
- Hair Care Products: The silica in the lagoon can be a bit drying if you have long hair. Bring a leave-in conditioner or some oil to keep it nice.
Arriving at the Blue Lagoon
So, you’ve booked your pass, and it’s finally the big day! Getting to the lagoon is straight-up easy, especially if you’re staying in Reykjavik. You can take a bus, a taxi, or even rent a car for a road trip experience.
Transport Options
If you opt for public transport, various bus services cater to visitors. The conveniently timed shuttles can pick you up from your hotel, and they often include a stop at the airport. Fantastic if you’re squeezed for time!
Check-In Process
Upon arrival, don’t forget to have your reservation handy. The friendly staff makes the check-in process seamless. Have your ID and any confirmation emails ready, just in case!
Maximizing Your Time at the Lagoon
Once inside, take a deep breath… and relax! Here are some tips to get the most out of your visit.
Pace Yourself
With so many amenities, it can be tempting to try everything at once. Start with a soak in the lagoon, followed by a steam or sauna session. Remember: this isn’t a race; it’s about unwinding.
Don’t Skip the Snack Bar
Even if you’re on a budget, the snack bar offers delicious local fare at reasonable prices. Consider treating yourself to a traditional Icelandic hot dog; they’re famous for a reason!
Wrapping It Up
Booking your Blue Lagoon landing pass doesn’t have to be daunting. With the right planning, almost anyone can enjoy this breathtaking experience without a hitch. By keeping these tips in mind, you’ll be ready to soak in the stunning scenery and relax your worries away. Who wouldn’t want that?
Happy travels, and enjoy your well-deserved downtime in Iceland!
[Related: Explore more about Iceland’s hidden gems here.]
**Related Reading:** – [Related: How to Plan a Solo Trip on a Budget] – [Related: Top Destinations for First-Time Solo Travelers] **#SoloTravel #Book #Blue #Lagoon #Landing #Passes #Top #Tips #Travelers**